Monday, September 5, 2011

The Red Z is sold!

Guys its been over 3 years since my last post on here. The car was just sold as of July 2011. I enjoyed the car for over 7 years and just decided it was time to move on. I am going to devote this page to my red Z and will also be starting a page for the 03 track model 350z that I have had for a few years now. Here are a few pictures and videos from closer to the end of ownership for my red Z. I will also post a final mods list as well.

Video of the last burnout in my red tt z-


Video of my last drive in my red tt z-


Video of me in the red car drifting in the practice lot-


Last shot of the engine before selling-

Photobucket

Last shot of the outside of the car-

Photobucket

A few of my cars together-

Photobucket


Wednesday, December 31, 2008

My custom dual 1 piece exhaust "how to" with pictures and details.

I have been needing to make this post for a very long time now.. few years to be exact. I have literally had hundreds of people that have asked about my exhaust so here is a full writeup on it and how it was made along with A LOT of pictures of it on and off the car. I really didn't want to do this before because I had actually planned on trying to possibly patent and market the exhaust. But now I have to many things on my plate and just want to help better the Z community with my personal contribution that you guys can build off of and make better. If you market it and make money from it send a few bucks my way =] seriously lol. Then again before the end of the year Z1 and AMS will probably have it being mass produced in China for $1000 a setup (again, seriously).

Annnywho the basics is it is a full 1 piece 2.5" dual exhaust from the downpipes back going back to a set of can style mufflers. It is a true 1 piece because other than bolting to the downpipes its all one welded unit that cannot be taken apart. It has a single H-pipe installed as soon as both exhaust sides start to straighten out. It is also VERY VERY LIGHT. I weighed it once when it was off of the car and it was amazingly light compared to the stock exhaust. You can literally pick it up over your head with one hand and carry it.

When I set out to do this exhaust I was on a budget given I had just been married and moved into a new house. I did however take time to sit down and draw up a good design that I knew would flow really well and not look dog ugly, to me anyways.

Here is the breakdown with pics.

Here is the stock twin turbo exhaust unit that is bolted up in 3 separate pieces on each side. Its missing a muffler in the picture. Big and nasty huh??
Photobucket


The kit started out with a set of divorced downpipes and a set of mandrel bent test pipes pictured here;
Photobucket

I installed the downpipes and left the test pipes open, VERY LOUD. The reason is because I had already drawn up a design for the new exhaust and was going to take it up the next day to help hand make it. The first design I drew up was based on the current mufflers I had which were flowmasters. I had been told that they were a different series that were ok for turbo cars which means they flow pretty much straight through. Later on though I found the series number and realized that they were NA only mufflers and had been severely killing my cars power by choking it nearly to death.

Here is a picture from underneath with the flowmasters installed. It is a lot different now because I angled the exhaust mufflers so there would be less of a bend. Also at this time it had no H pipe installed so it was a very true dual exhaust.. neither side of the exhaust touched the other from front to back.
Photobucket

I ordered a cheap set of can mufflers from ebay to hold me over for a while until I could find some NUR spec units which I have still been unable to find at a reasonable price. I think these cost me in the neighborhood of $50 shipped on ebay lol
Photobucket
Photobucket

Photobucket

Here is the exhaust in its final form and redesign. You can see here that I used the original test pipes and cut the rear flanges from them which allowed me to actually weld on the other parts and make it a true one piece. I will try to get some more measurements and the angles written down for you guys so you will have exact instructions to make your own. If you are making one before I get them up, just show the exhaust fab person mine and let them do their best to get it as close as possible. It also has very simple/cheap hangers because I wanted to be able to take it off very quickly at the track by myself if need be for open downpipe runs which never happened but its nice knowing that I can take it off in just a few minutes. This is the first time I have ever posted pictures of the exhaust so I really hope this helps you guys out there that wanted me to help you with designing one like mine. This is after about a year of use and I had a power steering leak at the time. Enjoy :)
Photobucket
Photobucket
Photobucket

and here it is installed. I will try to find a pic from under the car after the redesign.
Photobucket

Here are a few videos. The first is an exhaust comparison between the first design I did and the second. In the first video also both videos within were taken hours apart. It still sounds a LOT deeper in person. Just make sure you check out the in car video as well which is what it sounds like in real life from the outside if that makes any since.


Here is the in car video. This is exactly what the car sounds like from the inside with the silencers out.


Here it is from the front and very far away.. listen to how loud it is.


And last is one from an enclosed parking lot. Its very loud, listen to the turbos whistle the entire time lol Has a nice little engine rev at the end.


The exhaust made such a wonderful difference. It seemed with just the blip of the throttle the turbos were spooled and I was either nailed against the seat or sideways according to what gear I was in. On high boost this exhaust sounds so so so so good. Anyways I hope this helped some of you or it was at least a good read. Thanks and if you have any questions be sure to leave a comment on this blog and please add me as a friend if you like my work. Again keep checking back for updates on the new engine build! I should have many many pictures and a video of the "last drive" which will be the journey across town with me driving the car to the garage I will be tearing it down in. It will be the last drive on that engine setup though which will make me sad after it being so faithful after close to 5 years.

Monday, December 22, 2008

Really close to pulling the engine in the Z

The Explorer is almost done getting an engine transplant which means I can pull the Z into the garage and yank the engine out here really soon and get started on it. Right now I am wanting to keep it simple with new main/rod bearings, piston rings, full engine gasket set, head porting/polishing, exhaust manifolds porting/polishing/port matching and possibly a set of GT28R turbos from a stock S14 SR20DET blacktop engine. Shouldn't take very long at all and I will be sure to post plenty of pictures and vids for you guys as it moves along.

BTW for those of you wondering how she died. I have had this car for a long time now and have been wanting to do some upgrades that involve pulling the engine for a while now. The problem is that it just ran so well for the longest time I felt it would be foolish to pull the engine when I could be out enjoying the car.

Well about 4 days ago I was driving the car and it started making the very annoying lifter tick sound even though it was perfect on oil. I said to myself it was time for a slight engine upgrade and that if my current engine was going to go, it was going out in style. SO. I was at my parents house which is about 12 miles from my home. I drove the car all the way from their house to mine in 2nd gear @ anywhere from 55-60mph the whole way running in the 6500-7000rpm range. Believe it or not the was fine when I get home. I checked it out hoping for a failure but it was solid AND it fixed the lifter tick lol. Then I changed my mind about blowing it up and figured I would drive it until I got my Explorer running again... yeah... I went back out to do some work on the car and when I was pulling it back into the driveway I noticed a very slight tap over 3000 RPM.. the very distinct tap of a rod bearing haha. The car has been parked ever since and will sit there until the garage is cleared up. Wish me luck guys. I have until spring to get it done for the race season. Actually I wouldn't care to get it done around the beginning of March so I can break it in before the racing starts.

Should be a fun trip, join me by checking for my blog updates :)

**Udate. Found an engine for the Explorer which is getting picked up Friday. Hopefully that weekend I will have it in and running so I can get the Z in and the engine out of it!**

Thursday, December 18, 2008

My Zs current mod list and lots of past/current pics

Photobucket

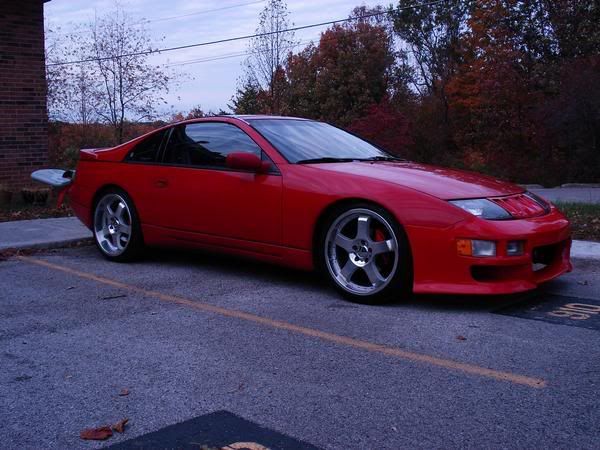
I am the third owner of this can and have owned it since 2004. Its been a great machine and is getting ready to go down for the winter for some mild upgrades.

This is the current mod list but its also getting ready to change. As of yesterday the car developed a really light rod knock at 3k rpms and above so its parked as of now to keep from causing any damage to the crank or other engine internals. The new rebuild will be almost basic given I plan to do a much more powerful engine build next fall.

Mods List and specs as of Dec 2008-

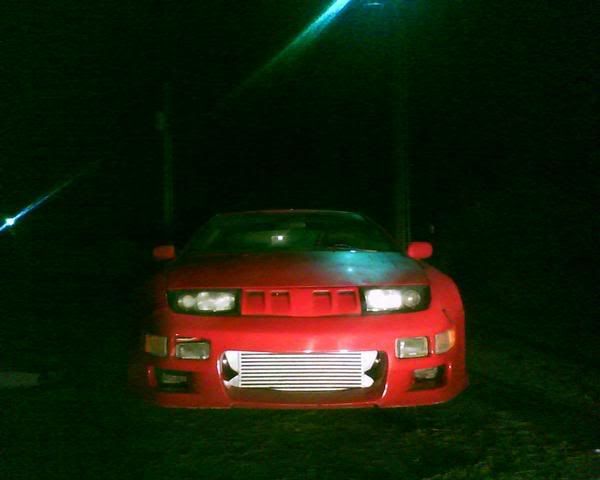
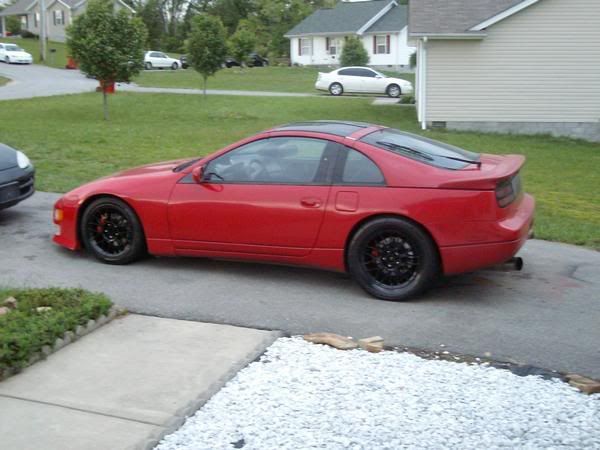
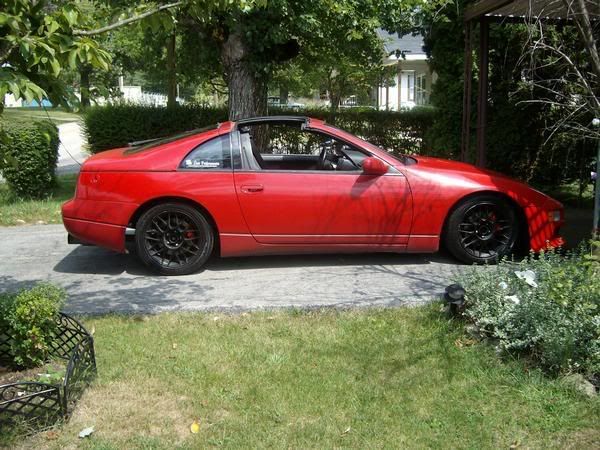
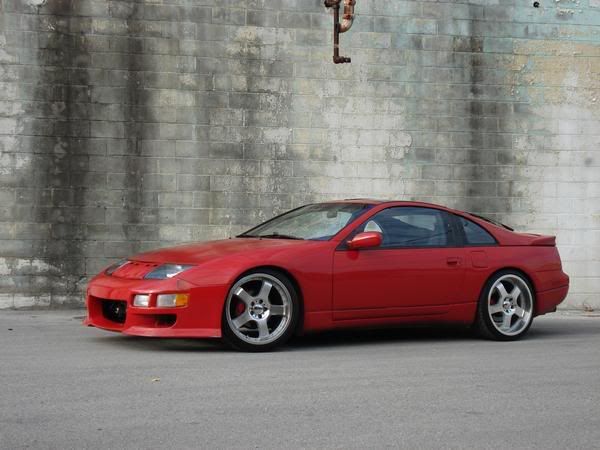
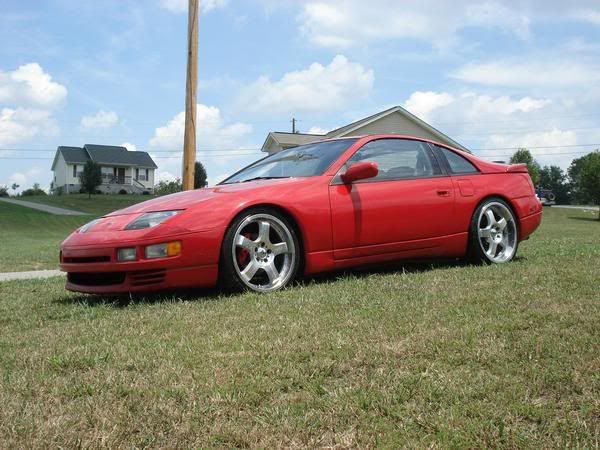
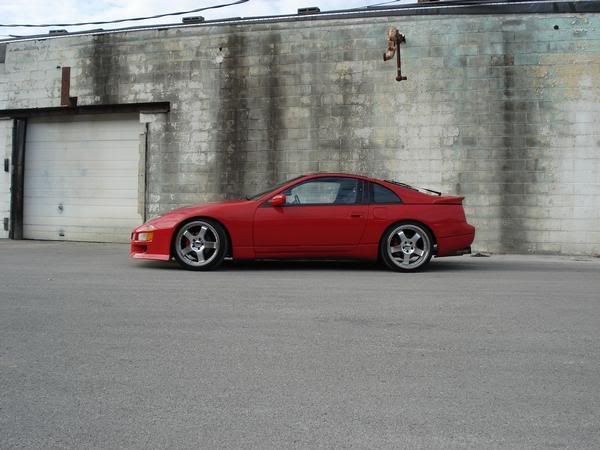
1991 Stage 3 Twin Turbo 5-Speed


**Outside**
*Wings West front fascia
*Stillen Vented center nose panel
*Full NA rear hatch
*8000k HID plug and play kit
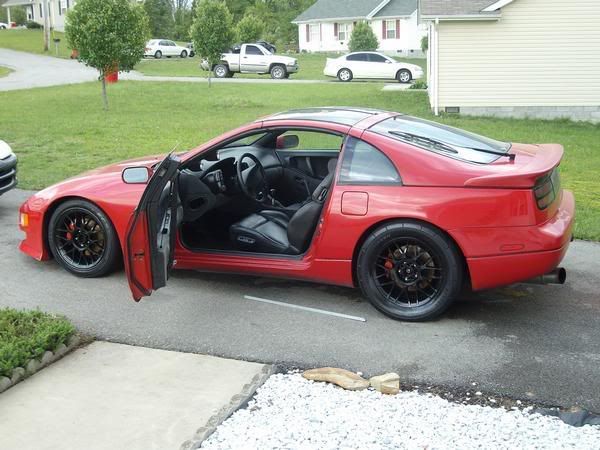
**Inside**
*Full 95 charcoal suede interior panels also including door panels, entire center console and dash

**Engine/Trans**
*JWT Stage 3 Eprom & socket
*Apex Dual Chamber bovs
*Large GodSpeed front mount intercooler
*Custom TLP modified mirror polished upper plenum with almost all tabs deleted
*Stillen Single pop charger adapter and Stillen filter
*Chrome hard pipe kit
*Hand made metal air guide
*SR20DET oil catch can
*OEM hard and rubber fuel line setup replaced with all braided stainless fuel lines.

*RPS 6 puck clutch disk and pressure plate
*SPL Braided stainless clutch hose
*Billet short throw shifter
*Custom made aluminum shifter linkage support (Solid Shift Kit)
*Race weighted real CF shifter
*96 Model TT driveshaft

**Exhaust**
*2 1/2" SS divorced downpipes
*2 1/2" SS test pipes
*2 1/2" Custom catback
*2 Large can style mufflers. Sounds like a pure bread race car.

**Suspension**
*Completely custom coilover setup with interchangeable springs for road racing to drag racing
*Adjustable rear upper control arms for camber control
*Top speed HICAS eliminator
*NA power steering pump, lines and mount.. still laying in my office waiting to be installed :*(
*Energy suspension Steering Rack Bushings
*Energy suspension diff bushings
*Aluminum Rear subframe collars

**Electronics**
*Greddy Profec B Type 1 Boost controller
*Perrin Boost solenoid
*Greddy turbo timer
*JVC Head Unit
*Blaupunkt and Sony speakers
*Autometer boost and a/f (disco light) in A pillar pod

**Deletes/Relocation**
*AIV Delete
*Complete EGR system removed along with 300degree delete kit
*Safety boost solenoid delete
*Water jacket bypass
*Carbon Canister Delete and Bypass
*IACV hoses and brackets replaced with single hose
*PTU relocated under the nose piece

**Wheels/Tires**
*CURRENT- Back to the stock TT wheels for a cleaner look
*19x8.5 19x9.5 staggered Aluminum 5 star wheels **SOLD**
*Now running 16" Enkeis with Kumos in the front and 255/50/16 Mickey Thompson drag radials in the rear. **SOLD**

I am sure there is a lot of little stuff I am sure I am forgetting
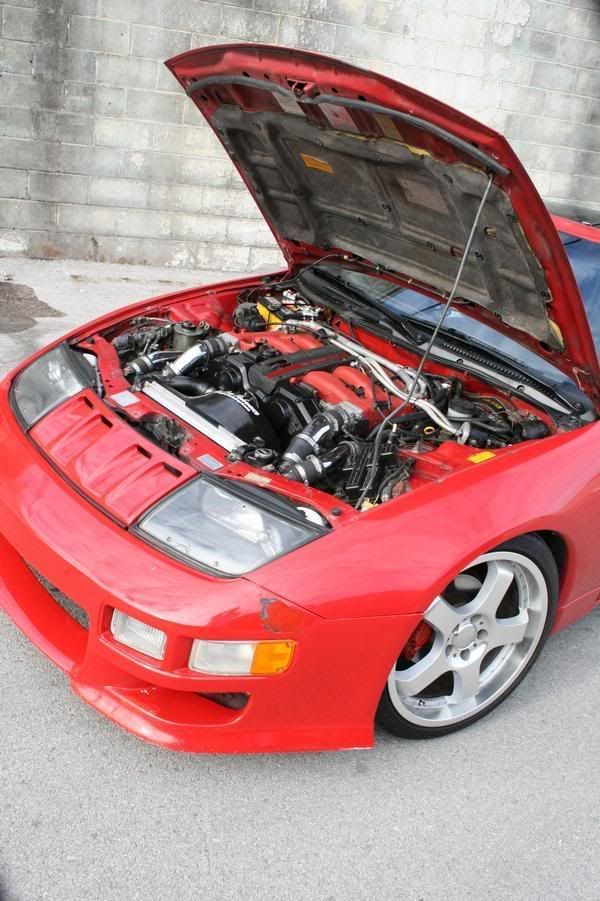
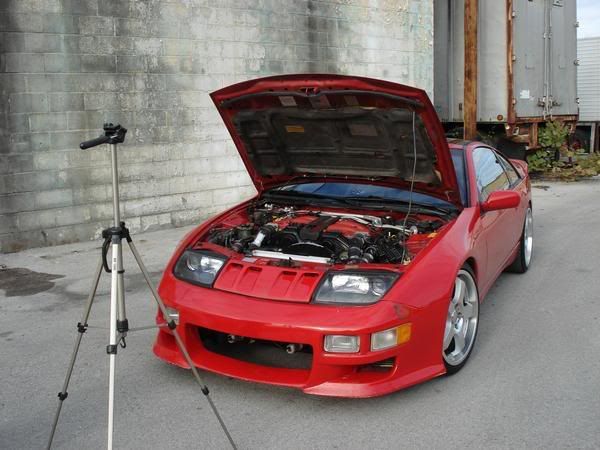


Engine shot-
Photobucket

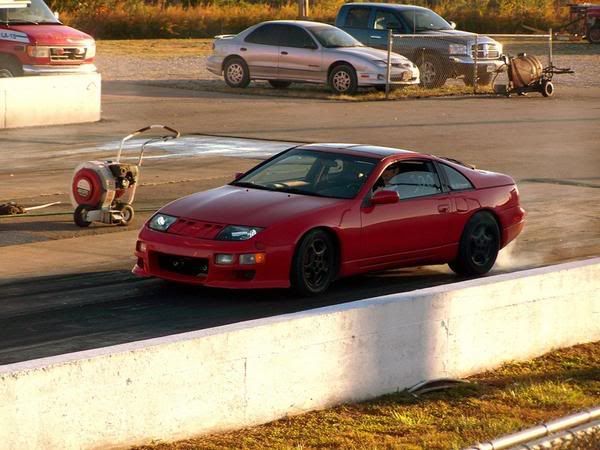
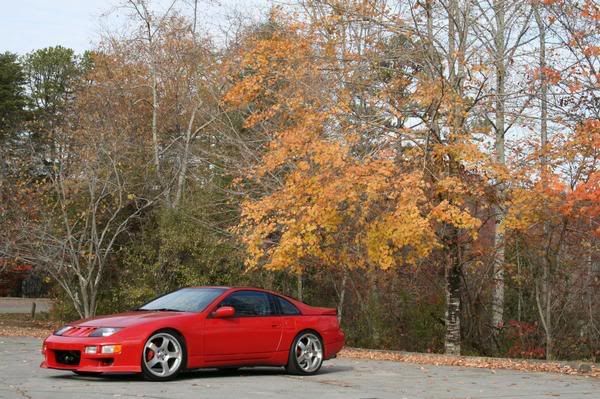
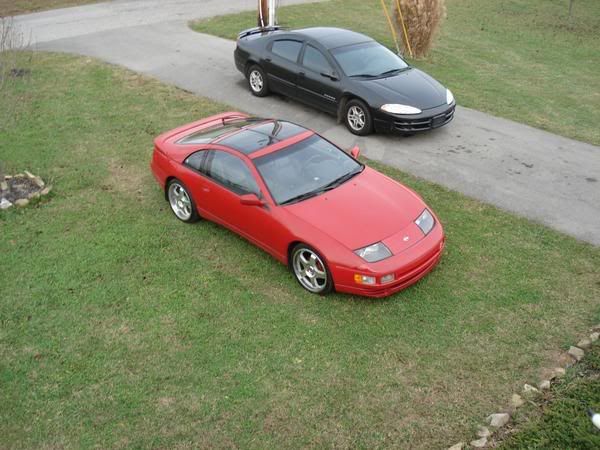
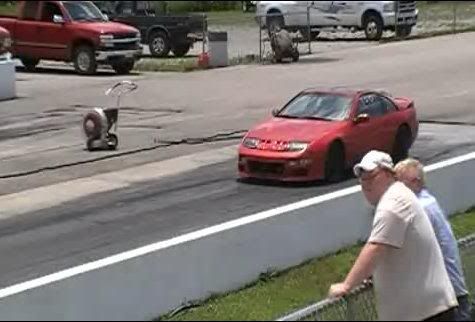
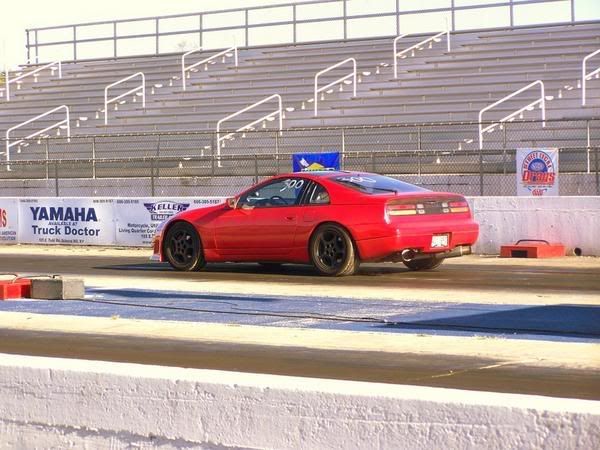
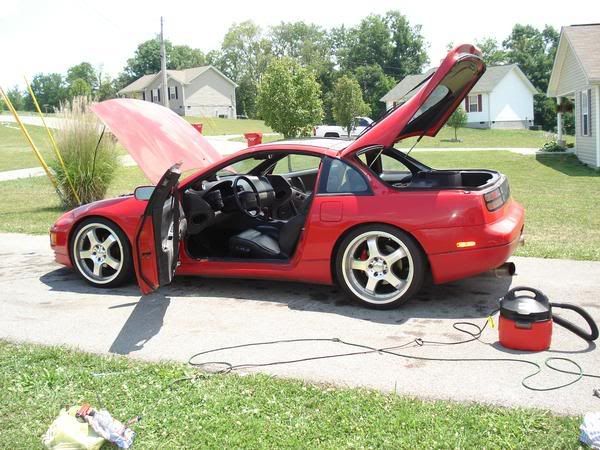
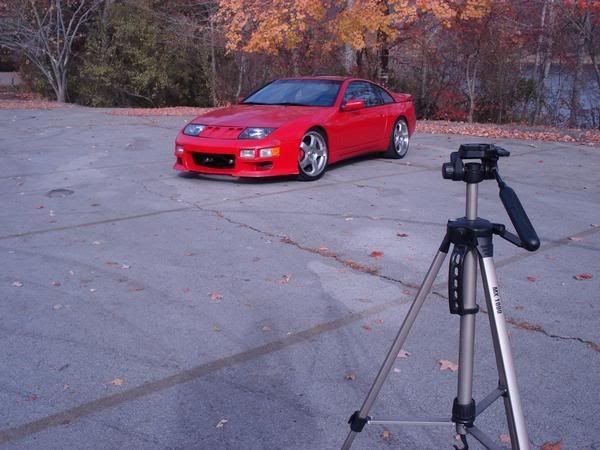
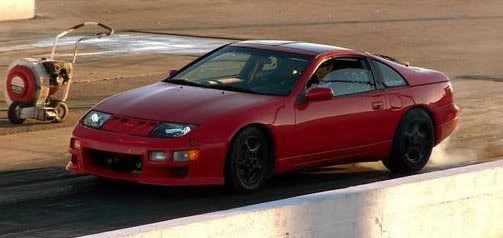
Here are a few other pics of the car racing, calendar shoot, under the knife, ect

PLEASE CLICK ON THE PICTURE IF YOU NEED TO VIEW ENTIRE PICTURE!;
Photobucket

Photobucket

Photobucket

Photobucket

Photobucket

Photobucket

Photobucket

Photobucket

Photobucket

Photobucket

Photobucket

Photobucket

Photobucket

Photobucket

Photobucket

Photobucket

Photobucket

Photobucket

Photobucket

Photobucket

Some of my popular Z videos

In car video from last year. Car was mildly tuned still with stock turbos, injectors and inner coolers.


Outside video of the car with full acceleration. Exhaust not and blow off valves very present.


In car acceleration video. Running 19x9.5 rear wheels with low profile Micheline Pilot Sports which offered next to zero traction in lower gears.


A neat camera approach at the lake.


A friend in a build GSX Eclipse and me playing around.


Enclosed parking lot video


Exhaust video


Open downpipe videos


Stay tuned for more videos!